Saturday, April 23, 2011
Monday, April 18, 2011
Simulated DOF
This is my first post of photos taken with my new Canon 550D DSLR with 18-55 lens. Powerful SLR (18 mega pixel), the features of which I am still trying to learn to harness its full capacity. Hopefully I will be able to put better photos here once I am fully ready to shoot with the camera.
Image below was taken few days ago. I have edited using Picasa 3.
Ideally, I would have loved to focus a bit more on the subject. The 'Soft Focus' feature made the F number look more like F2.8 than the original F5.6
ISO 100
55mm
F5.6
1/100
Cropped & Soft Focus using Picasa3
Labels:
550D,
Edited,
Photography
Thursday, April 7, 2011
Creating setup files using Inno Setup
Back with a 'programming' post after quite sometime.
I have been searching a free tool that lets me creates setup file for quite sometime. I used 'Install Maker' & 'Install Creator' while i was in college. They were never sufficient. Install shield is probably the widely used tool in the corporate world, but there are the problems of purchasing license with that.
I found Inno Setup when i was browsing the Wampserver's forum. After playing around it for sometime, I could understand the power of this free tool. It has a decent set of features and yet remains intuitive and very simple. It might take some time to understand how to get started, but once you cross that stage its a pleasure working with this tool.
Let us a very small example here where you want to install an application that you have written. As a part of the installation, you want to do the following.
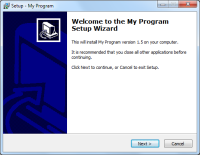
The 'Setup' section gives basic info about your setup file name. All these information will be displayed when the installation wizard is run. The 'AlwaysRestart' attribute in the setup section indicates the system must restart after the installation is complete.I have been searching a free tool that lets me creates setup file for quite sometime. I used 'Install Maker' & 'Install Creator' while i was in college. They were never sufficient. Install shield is probably the widely used tool in the corporate world, but there are the problems of purchasing license with that.
I found Inno Setup when i was browsing the Wampserver's forum. After playing around it for sometime, I could understand the power of this free tool. It has a decent set of features and yet remains intuitive and very simple. It might take some time to understand how to get started, but once you cross that stage its a pleasure working with this tool.
Let us a very small example here where you want to install an application that you have written. As a part of the installation, you want to do the following.
- Copy your executable(s) and place it in the folder specified by the user during installation. {HelloWorld.exe}
- Install a font in the PC. This font shall be used by your application when it runs later. {HelloWorld.ttf}
- Create a registry entry.
- Restart the PC once installation is complete.
#define MyAppName "Hello World"
#define MyAppVersion "1.0"
#define MyAppPublisher "Rmn"
#define MyAppURL "http://rmn-explores.blogspot.com"
#define MyAppExeName "Hello World.exe"
[Setup]
AppId={{D008C041-E0FA-4D83-9154-D458909FD58A}
AppName={#MyAppName}
AppVersion={#MyAppVersion}
AppPublisher={#MyAppPublisher}
AppPublisherURL={#MyAppURL}
AppSupportURL={#MyAppURL}
AppUpdatesURL={#MyAppURL}
DefaultDirName={pf}\{#MyAppName}
DefaultGroupName={#MyAppName}
OutputBaseFilename=setup
Compression=lzma
SolidCompression=yes
AlwaysRestart=yes
[Registry]
Root: HKLM; Subkey: "Software\HelloWorld\Settings"; ValueType: string; ValueName: "InstallPath"; ValueData: "{app}"
[Files]
Source: "D:\HelloWorld.exe"; DestDir: "{app}"; Flags: ignoreversion
Source: "D:\HelloWorld.TTF"; DestDir: "{fonts}"; FontInstall: "Hello World Font";
[Icons]
Name: "{group}\{#MyAppName}"; Filename: "{app}\{#MyAppExeName}"
Name: "{commondesktop}\{#MyAppName}"; Filename: "{app}\{#MyAppExeName}"; Tasks: desktopicon
The 'Files' section specifies the list of files that need to be copied to the PC during the installation. Pre defined constants appear within the { }. In this case {app} refers to the folder destination chosen by the user in the wizard. The second line in the 'File' section installs a font in the system.
The 'Registry' section mentions the entries that need to be created during the installation. The initial values can be put in there too.
 And finally, the 'Icons' section specifies if you need to create a desktop shortcut to the application or not. You can specify if you need to have a icon created in the programs menu.
Once this script file is ready, you need to compile it using the ISS compile that comes with the installation and your setup is ready.
Other options such as registering com dlls, running batch files are also available. The documentation that comes with the setup covers most of it.
Labels:
Windows
Subscribe to:
Comments (Atom)


