Pages

Showing posts with label Windows. Show all posts

Monday, July 18, 2011

GeekStudios presents "Scheduling Picasa Uploads"

Ok, So I am back after a blogger's lull.

The past 1 month, I have spent plenty of time taking traveling and taking photos. But when it comes to uploading those photos to Picasa Web Albums or post it here on my blog, I have never been able to do that. The simple reason is, each of my picture taken in my camera is around 5 MB and I have around 800 such photos in my memory card. Choosing the best pics, importing to Picasa (the desktop version) and then uploading to the web albums takes a lot of time, that I end up not doing it. The upload option available on the Picasa Web album does no good too, it uploads images with their actual sizes and takes long time to upload 5-6 photos (size comes up around 30MB)

So, over the weekend, I decided to put the Geek in me to work and develop a tool that can resize, schedule and upload images to Picasa web albums. Sounds cool right ? :)

And thus, Geek Studios presents "Scheduling Picasa Uploads", a tool created using C# to resize, schedule and upload images to Picasa Web albums so that you can share it online to your friends. With Picasa's integration to G+, this tool should come handy for many of you out there.

Download (Download the zip file and unzip it to a location in your system)


8 Simple steps to use it
  1. Run PicasaScheduledUpload.exe. Login using ur gmail id and password
  2. Create a new album if required. It will be provided ‘private’ access by default
  3. Choose the album from the drop down where you want to upload the photos
  4. Choose the photos from your system which you want to upload
  5. Choose ‘Upload Now’ if you want to upload immediately
  6. If you wish to upload at a later point in time, choose the time in the time picker component and click ‘Upload later at’. The tool must be open and should not be closed before the scheduled upload time.
  7. Your pictures will be resized to ‘1600*1200’ and uploaded to the picasa web albums.
  8. Login to picasa web albums and verify if your files are uploaded and share the photos to your friends. 
4 Advantages of using this tool

  1. Resizing images to save network bandwidth and memory space on your albums
  2. Scheduling the uploads so that you can choose to upload without affecting your work
  3. You can choose to upload images from multiple folders and multiple devices (memory card, external hard disk) to your web albums
  4. Save time, this is quick and I was able to upload around 100 images within 5 minutes. This was not the case with Picasa Desktop or the web albums.

Known Issues & Limitations
The scheduling & uploading logic is poorly written, and the UI would appear to be frozen when the upload is in progress. I was just too lazy to spawn a thread and upload in that thread.

The user name and password you provide you on the UI are 100% SAFE and SECURE, it is NOT STORED or DISTRIBUTED ANYWHERE or TO ANYONE else. The login procedure is handled Google's SDKs and if any one out there needs confirmation, the source code will be provided on request.

I would love to hear feedback from you guys. Please try it and let me know. Have fun !

Thursday, April 7, 2011

Creating setup files using Inno Setup

Back with a 'programming' post after quite sometime.

I have been searching a free tool that lets me creates setup file for quite sometime. I used 'Install Maker' & 'Install Creator' while i was in college. They were never sufficient. Install shield is probably the widely used tool in the corporate world, but there are the problems of purchasing license with that.

I found Inno Setup when i was browsing the Wampserver's forum. After playing around it for sometime, I could understand the power of this free tool. It has a decent set of features and yet remains intuitive and very simple. It might take some time to understand how to get started, but once you cross that stage its a pleasure working with this tool.

Let us a very small example here where you want to install an application that you have written. As a part of the installation, you want to do the following.

  1. Copy your executable(s) and place it in the folder specified by the user during installation. {HelloWorld.exe}
  2. Install a font in the PC. This font shall be used by your application when it runs later. {HelloWorld.ttf}
  3. Create a registry entry.
  4. Restart the PC once installation is complete.
#define MyAppName "Hello World"
#define MyAppVersion "1.0"
#define MyAppPublisher "Rmn"
#define MyAppURL "http://rmn-explores.blogspot.com"
#define MyAppExeName "Hello World.exe"

[Setup]
AppId={{D008C041-E0FA-4D83-9154-D458909FD58A}
AppName={#MyAppName}
AppVersion={#MyAppVersion}
AppPublisher={#MyAppPublisher}
AppPublisherURL={#MyAppURL}
AppSupportURL={#MyAppURL}
AppUpdatesURL={#MyAppURL}
DefaultDirName={pf}\{#MyAppName}
DefaultGroupName={#MyAppName}
OutputBaseFilename=setup
Compression=lzma
SolidCompression=yes
AlwaysRestart=yes

[Registry]
Root: HKLM; Subkey: "Software\HelloWorld\Settings"; ValueType: string; ValueName: "InstallPath"; ValueData: "{app}"

[Files]
Source: "D:\HelloWorld.exe"; DestDir: "{app}"; Flags: ignoreversion
Source: "D:\HelloWorld.TTF"; DestDir: "{fonts}"; FontInstall: "Hello World Font";

[Icons]
Name: "{group}\{#MyAppName}"; Filename: "{app}\{#MyAppExeName}"
Name: "{commondesktop}\{#MyAppName}"; Filename: "{app}\{#MyAppExeName}"; Tasks: desktopicon

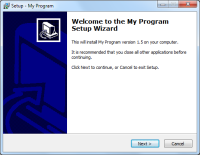
The 'Setup' section gives basic info about your setup file name. All these information will be displayed when the installation wizard is run. The 'AlwaysRestart' attribute in the setup section indicates the system must restart after the installation is complete.

The 'Files' section specifies the list of files that need to be copied to the PC during the installation. Pre defined constants appear within the { }. In this case {app} refers to the folder destination chosen by the user in the wizard. The second line in the 'File' section installs a font in the system.

The 'Registry' section mentions the entries that need to be created during the installation. The initial values can be put in there too.

And finally, the 'Icons' section specifies if you need to create a desktop shortcut to the application or not. You can specify if you need to have a icon created in the programs menu.

Once this script file is ready, you need to compile it using the ISS compile that comes with the installation and your setup is ready.

Other options such as registering com dlls, running batch files are also available. The documentation that comes with the setup covers most of it.

Friday, November 19, 2010

Scheduling torrent downloads using Vuze

In this post, let me explain how you can schedule your torrent downloads using torrent client called 'Vuze' formerly called as 'Azerus'. Most of us have broadband connections that allow free download during certain hours of the day. In my case, my BSNL broadband connection allows me free downloads between 2AM to 8AM. It was practically impossible for me to stay awake till 2 in the night and start the download. So when i searched the internet for clients that allow scheduling of downloads, i came across 'Vuze' along with speed scheduler.

1. Download and install the torrent client from http://www.vuze.com/. The installation is fairly easy and straight forward.

2. Start Vuze and select the 'Installation Wizard' from the 'Plugins' option in the 'Tools' menu as shown below.


3. In the dialog box that opens up, Choose 'By list from SourceForge.net'. Ensure that you are connected to the internet :). Click next.


4. Choose 'Speed Scheduler' from the options and then press 'Next' and then 'Finish'


5. The following dialog box will appear if the installation is complete properly.


6. You can find 'Speed Scheduler' in the 'Plugins' menu. Open it and you can schedule downloads as shown below.


The green tick indicates the schedule that is currently active.

Hope you guys find it useful and happy downloading :)

Friday, September 3, 2010

Windows service using C

For a very long time I did not know what a windows service was. When I came to what it was, I thought I had learnt something important far too late. As they say, 'It is better to be late then never at all' ;) For people who don't know what a service is, A service is a console application that runs in the background and performs tasks that don't require user interaction. The Windows NT/2000/XP operating systems offer special support for service programs. The installed services can be configured through the Services applet, available from the Control Panel in Windows NT or from Control Panel | Administrative Tools in Windows 2000/XP. Services can be configured to start automatically when operating system starts, so you dont have to start each of them manually after a system reboot

Writing a windows service and installing on windows was a lot easier than I thought. This blog will explain how to write a simple windows service using C and install it.

A window's service program contains 3 parts,
  1. Main function
  2. Windows Service's Main function
  3. Control Handler function

The main function does nothing but lists the services that this program contains.
The program contain any number of services, the list must be terminated with a NULL entry into the list.

The Window's Service main is the entry point for your service.  This function should accomplish 3 things. It must set the appropriate status of the service using SetServiceStatus. The argument to the function is a SERVICE_STATUS. This function should register the controlhandler function for this service. The functionality of the control handler will be explained below. And finally, this function should not exit. If it does, the service will move to a 'STOPPED' state in the services applet.An ideal way of implementing this is using a while loop which checks for the state of the service status variable. (shown below).

The control handler handles the request to the service such as stopping it. Stopping the service can be triggered from the services applet. All cleanup code that the service must execute while exiting must be written here.

Sample Program,  SampleWindowsService.cpp

#include
#define SLEEP_TIME 5000

SERVICE_STATUS ServiceStatus;
SERVICE_STATUS_HANDLE hStatus;

void  ServiceMain(int argc, char** argv);
void  ControlHandler(DWORD request);

void main()
{
    SERVICE_TABLE_ENTRY ServiceTable[2];
    ServiceTable[0].lpServiceName = "MemoryStatus";
    ServiceTable[0].lpServiceProc = (LPSERVICE_MAIN_FUNCTION)ServiceMain;

    ServiceTable[1].lpServiceName = NULL;
    ServiceTable[1].lpServiceProc = NULL;
    // Start the control dispatcher thread for our service
    StartServiceCtrlDispatcher(ServiceTable); 
}

void ServiceMain(int argc, char** argv)
{
    int error;

    ServiceStatus.dwServiceType        = SERVICE_WIN32;
    ServiceStatus.dwCurrentState       = SERVICE_START_PENDING;
    ServiceStatus.dwControlsAccepted   =  SERVICE_ACCEPT_STOP | SERVICE_ACCEPT_SHUTDOWN;
    ServiceStatus.dwWin32ExitCode      = 0;
    ServiceStatus.dwServiceSpecificExitCode = 0;
    ServiceStatus.dwCheckPoint         = 0;
    ServiceStatus.dwWaitHint           = 0;

    hStatus = RegisterServiceCtrlHandler(
        "MemoryStatus",
        (LPHANDLER_FUNCTION)ControlHandler);


    if (hStatus == (SERVICE_STATUS_HANDLE)0)
    {
        // Registering Control Handler failed
        return;
    } 

    // We report the running status to SCM.
    ServiceStatus.dwCurrentState = SERVICE_RUNNING;
    SetServiceStatus (hStatus, &ServiceStatus);

    MEMORYSTATUS memory;
    // The worker loop of a service
    while (ServiceStatus.dwCurrentState == SERVICE_RUNNING)
    {
        Sleep(SLEEP_TIME);
    }
    return;
}

// Control handler function
void ControlHandler(DWORD request)
{
    switch(request)
    {
        case SERVICE_CONTROL_STOP:
            ServiceStatus.dwWin32ExitCode = 0;
            ServiceStatus.dwCurrentState  = SERVICE_STOPPED;
            SetServiceStatus (hStatus, &ServiceStatus);
            return;

        case SERVICE_CONTROL_SHUTDOWN:
            ServiceStatus.dwWin32ExitCode = 0;
            ServiceStatus.dwCurrentState  = SERVICE_STOPPED;
            SetServiceStatus (hStatus, &ServiceStatus);
            return;
       
        default:
            break;
    }

    // Report current status
    SetServiceStatus (hStatus,  &ServiceStatus);

    return;
}

To install this service on your operating system, you'll need to use the SC.EXE executable, which comes with the Win32 Platform SDK tools. You will use this utility to install and remove the service. The other control operations will be done through the Services applet.
Here is the command-line to install your windows service:

sc create SampleWindowsService binpath= 
c:\MyServices\SampleWindowsService.exe
 
To remove the service from the system, execute the following command:

sc delete SampleWindowsService

Specify the delete option and the service name. The service will be marked for deletion and will be completely removed after the next restart.

Friday, August 20, 2010

TeamViewer - Remote Access to PCs

Now that we have friends and family geographically placed in different locations, there arises situation where you need to help some one with an installation or configure some software in the PC. Previous ways of doing it included sending mails with detailed steps and snapshots to do the job or guiding them over phone while they perform the job. This however does not work all the time. I started searching for software that would let me remotely access PCs and control them and I came across Team Viewer.

The software is relatively easy to install and use. I had no problems in the installation or the usage. There is very minimal latency involved while you remotely access the PC. It has few nice features such as chat & file transfer.

The entire steps involved are explained here.

Other software that you can use are GotoMeeting, GotoMyPC.  Teamviewer is totally free for non-commercial usage, which is good enough for us. There are trial versions available for GotoMeeting and GotoMyPC over a short period of time. Hope you guys find it useful !!

Thursday, July 29, 2010

FFMpeg - Building on Windows

FFMpeg is probably the most widely used Encoder/Decoder library. It helps you when are working in a project that involves video processing. As with any open source project, it has very limited documentation. An article by by Martin Böhme (Using libavformat and libavcodec) and Stephen Dranger (FFmpeg and SDL Tutorial) were the only good articles available around. Apart from this, you might need to look into OutputExample.c that comes with the FFMpeg source code. I had a very hard time trying to learn from these tutorials and use 'libavcodec' library in my programs.This has been my prime motivating factor to start this blog.

The first thing about Open Source projects is, they dont distribute binaries. They distribute only the source code. So it makes your life harder to understand to download the source code, setup the build environment and then take a build. This process, though, is inevitable. If you really wish to skip the building process and get only a build, you can get them here. (P.S. these builds are outdated. If you plan to use it in your commercial application, you might need to search for an LGPL build. Else you will end up in FFMpeg's Hall of Shame)

Let's start with the build process. :)

Stuff to Download
  1. Download MinGW from here.
  2. Download MSYS from here.
  3. Download updated bash for MSYS from here.
  4. Get the latest snapshot of ffmpeg from here

Installing MinGW
  1. Click 'Next'
  2. Choose 'Download and Install' and click 'Next'
  3. Click 'I Agree'
  4. Choose 'Current' and then 'Next'
  5. Choose 'MinGW base tools' and 'MinGW Make'
  6. Choose Destination folder as 'C:\MinGW'
  7. Click 'Install'. The download will take some time and then will complete the installation.
  8. Click 'Next' and then 'Finish' to complete the installation.
Installing MinSys
  1. Click 'Yes'
  2. Click 'Next'
  3. Agree to the license agreement by clicking 'Yes'
  4. Click 'Next'
  5. Choose 'C:\msys\1.0' as destination folder and click 'Next'. Click 'Yes' to create a directory if not already there
  6. 'Installation for i386 based CPUs' should be selected, Click 'Next'
  7. Click 'Next' and then 'Install'
  8. The command window that opens will ask if you wish to continue with post install, type 'y'and press enter.
  9. Type 'y' and press enter when it asks if you have MinGW installed.
  10. Type 'C:/mingw' when it asks for your MinGW installation. (without quotes)
  11. Type 'y' when if it asks for adding mount bindings.
  12. Press enter and then Click 'Finish' to complete the installation.
Building FFMpeg
  1. Extract CoreUtils to a folder. Copy the contents in the extracted 'bin' folder to "C:\msys\1.0\bin"
  2. Extract the ffmpeg sources. I’ll assume you’ve extracted them to c:\work\ffmpeg .
  3. Open MSYS and navigate to C:\work\ffmpeg
  4. Type "./configure --enable-memalign-hack --enable-shared" and press Enter. --enable-memalign-hack is to specify that you need windows binaries and --enable-shared is to specify to build 'libavcodec.dll' and 'libavformat.dll'
  5. By default, it is an LGPL build. You need specify -enable-gpl. For more info on command line arguments, type ./configure --help
  6. Type 'make' and press 'Enter'
And there you have it, your ffmpeg binaries are ready to be used.

I have personally verified all the above mentioned steps, but then you may face problems during the whole process. The following links might of use in that case.

Installing MSYS
http://www.transana.org/developers/setup/AudioExtract/MSYS-Win.htm

Building ffmpeg on windows
http://www.gooli.org/blog/building-ffmpeg-for-windows-with-msys-and-mingw/
http://www.ffmpeg.org/general.html#SEC20

Building FFMpeg on linux is fairly easy. I have not tried building it on other platforms.